Friday 30 September 2016

What to Wear In Italy According to the It Girls

Since Isabelle Daza’s wedding—which happened a few weeks ago— our Instagram feeds have been filled with enviable snaps by none other than Manila’s It girls. With gorgeous travel photos, Anne Curtis, Solenn Heussaff, Georgina Wilson and the whole squad have wandered Italy in style. For a country as beautiful as Italy with its cobbled streets and pastel colored houses, it’s fitting to wear something just as light and romantic. Think flowy skirts, floral prints, and bright dresses.
So if you’re traveling to Italy anytime soon or planning a trip to cities like Rome, Florence, Milan, or Venice next year—and you’re looking for perfect OOTDs to match the beautiful sceneries—look no further, here are a few outfit ideas for your Italian getaway.
screen-shot-2016-09-19-at-3-38-38-pm
Photo via @annecurtissmith
With the sun-kissed glow you’ll get from the Tuscan sun, a white dress like Solenn’s would be perfect to show off that tan. For cute and comfy separates, try Anne’s top and skirt combo with a pair of flats—perfect for a long walk around the city.
anne-curtis-italy
Photo via @annecurtissmith
    If you’re planning to go on a boat trip, look for a printed sundress that will easily stand out. Top your outfit with a hat for the full Italian getup.
screen-shot-2016-09-19-at-11-16-37-am
Photo via @annecurtissmith
Once you have time to go on a beach trip like the Amalfi Coast, wear a cute one-piece swimsuit with a midi skirt so you can easily put it on and off whenever you want to go for a swim.
Georgina Wilson
screen-shot-2016-09-19-at-11-30-05-am
Photo via @ilovegeorgina
Go for vivid colors like Georgina. We love this mustard long-sleeved dress and white sneakers combo.
Jess Diaz Wilson
screen-shot-2016-09-19-at-11-32-55-am
Photo via @jessdiazwilson
Even Georgina’s sister Jess rocked playful, bold colors. This denim top and printed skirt look would definitely make you stand out.
Liz Uy
liz-uy-italy
Photo via @lizzzuy
Liz Uy proves you can never go wrong with denim stripes.
bea-soriano-italy
Photo via @beasoriano
On days that feel colder than usual, bring a classic denim jacket to complete your look like Bea Soriano.
screen-shot-2016-09-19-at-11-23-10-am
Photo via @isabelledaza
Want a low-key but classy look? Take it from the bride herself, Isabelle Daza wears a basic top and shorts with two statement pieces: a printed and fur-lined loafers.
Martine Cajucom 
screen-shot-2016-09-19-at-11-34-17-am
Photo via @ilovemartine
For a fun and easy look, steal Martine Cajucom’s outfit as she paired a T-shirt with a denim skirt. To add that extra pop of color, carry around a bright colored sling bag.

Saturday 24 September 2016

Friday 23 September 2016

Mesh Beach Bag Tutorial from pm-betweenthelines

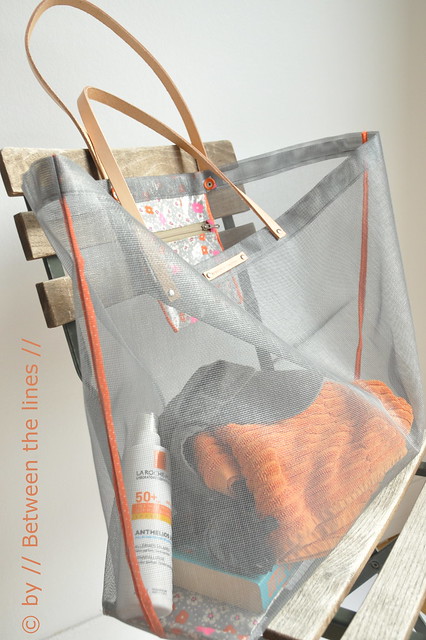
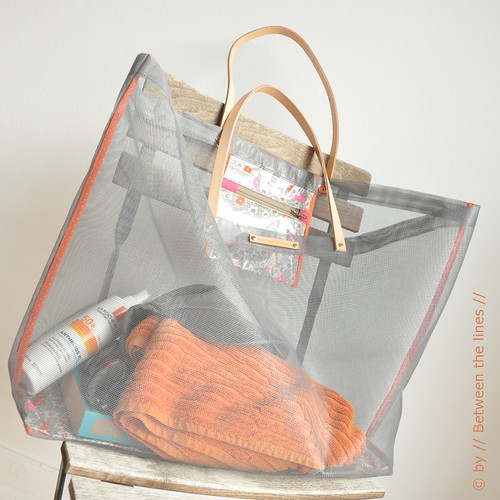
Mesh Beach Bag

Only three more school days before Summer vacation begins here! And no, I'm not ready yet! The past couple of weeks have been extremely busy - I thought with the kids growing up things would get easier but it's quite the contrary, bringing them from one place to the other, from one activity, party, event to the next has been challenging.

More than once during those past few weeks, I've been wanting to escape to our little place near the beach. Not because the weather has been that great (which it hasn't) but just because of the peace the sea, the sand, the wind, the air seem to bring along.
I love all of it... except maybe for the sand everyone brings into the house, including me.

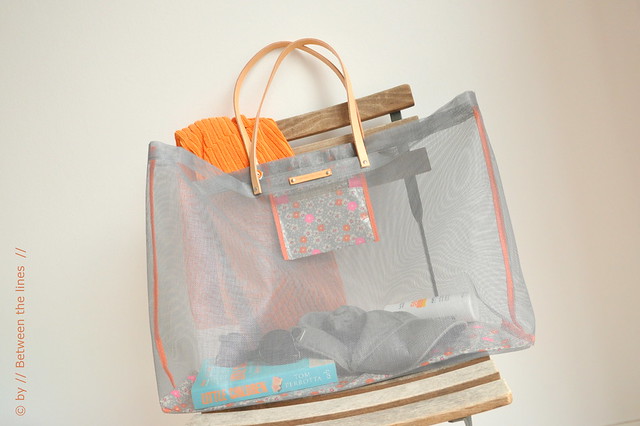
But now I've got the solution for a sand-free home. As off now we'll be using this special beach bag made out of... window screen material! Yes, you saw that right! The exact same kind of screen used to keep away mosquitoes and other annoying bugs! You can buy it by the yard/meter at any hardware store.

I came up with this idea after seeing a lady at the Friday morning market with the most interesting mesh bag. As a matter of fact, the bag was so interesting I started talking to her. It was over 15 years old and still in perfect shape and no, they weren't for sale anymore. But it got me thinking...
Mesh Beach Bag

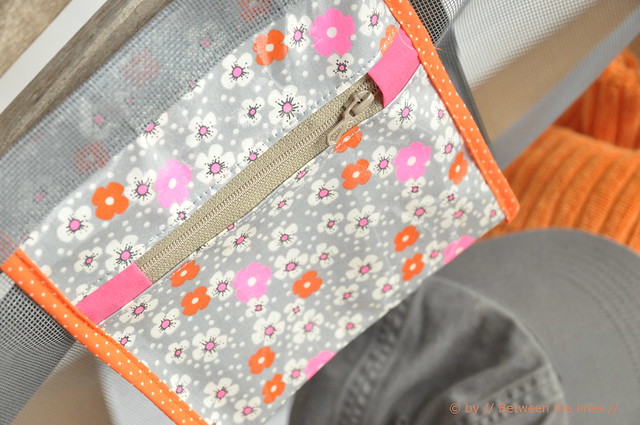
So here you got it, with a tutorial and everything. The original idea was much simpler than what I eventually came up with.  As I went, I added an oilcloth zippered pouch to safely put away those keys and some loose change for an ice cream. I also covered all seams with fabric bias tape and gave the bag an oilcloth bottom for sturdiness, which is attached to the bag at one side only. That way, you can lift it and all sand can be shaken out. Sure enough, sand will come in, but eventually, it also will come out with this type of mesh bag. Wet towels can air and everything put in the bag is within reach and visible.
So here's a new tutorial - it's been a while - I hope you'll like this bag as much as I do. And as it turns out, this is a project you could easily make re-purposing stuff you may have lying around: and old mesh window screen, an old oil cloth table cloth, an unused belt for the handles, ...


This is what you'll need:

- window screen material (moustiquaire in French - muggengaas in Dutch), new or used, 66 x100 cm
- a piece of plastic for the bottom - the Clover ones work fine, but any other piece of plastic/wood/ board would work evenly well.  13 x 51 cm (it can be cut to size)
- a piece of oilcloth, new or used, enough to cover the board and to make a zippered pouch (optional)
- bias tape, enough to cover side and bottom seams, and the zippered pouch side seams
- 15 cm zipper for the zippered pouch (optional)
- leather strip for handles (note: if you can't find any leather, you can use oilcloth or a piece of fabric to make your own handles) 
- rivets to attach handles
- hole punch
- scissors, thread
- sewing machine


Mesh Beach Bag

Instructions


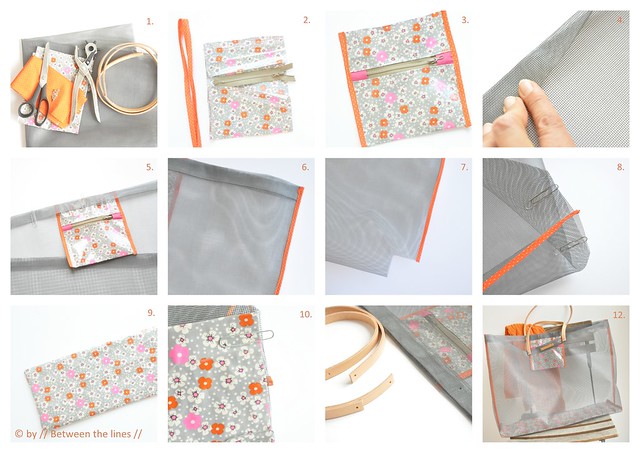
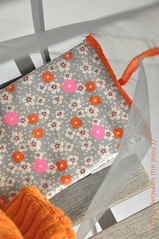
Zippered pouch (optional): (pictures 2 and 3)

1. Cut the following out of oil cloth:
- 1 rectangle, sized 17 x 6 cm
- 1 rectangle, sized 17 x 28 cm 
2. With the zipper facing the right side of the smallest piece of oilcloth, attach one side of the zipper. Fold over and top stitch. Repeat for the other zipper half and the largest rectangle. Top stitch.

3. Fold in half to form pocket and close side seams on the right side, about 0.5 cm from edge. Finish seam with bias tape (if you're a confident sewer you can do this in one go). Repeat for the other side seam: close on right side and cover with bias tape. No need to sew the top of the pocket closed as this part will be incorporated in the top hem of the bag.
Mesh Beach Bag


Bag Assembly 
1. Top hems (pic. 4-5): 

At the short end of the window screen material, fold in 3 cm and fold over again (pic. 4). Use a bone folder to make the crease, if necessary. Secure with paperclips. Top stitch into place. Repeat at the other short end, but now making sure to incorporate the zippered pouch, nicely centered. Secure with paperclips. Top stitch into place (pic. 5).

2. Side seams (pic. 6): 

Fold the screen material in half, with the right sides facing. Close the side seams, 0.5cm from the edge. Next, bind side seams with fabric bias tape (pic. 6)
3. Boxed corners (pic. 7-8): 

Sew boxed corners. 

Note: to avoid having to sew through too many layers you can pre-cut the boxed corners. If you prefer to play it safely, you can cut away the excess material after sewing the boxed corners.

If you wish to cut before sewing the boxed corners cut away a square with sides equal to the width of the panel divided by two, however don't forget to take into account seem allowance! (so if panel is 6cm wide, take off a square with sides equal to 5cm)
4. Bag bottom stabilizer (pic. 9): 


Make an oil cloth cover for the plastic bag bottom stabilizer, by sewing two pieces of oil cloth together, the size of the board + 1cm of seam allowance on all sides, leaving one of the short ends open. Turn over, insert the board.

5. Attaching bag bottom stabilizer to bag (pic.10):

Align the open end with one of the boxed corners as shown in pic. 10. Sew together. Bind seams with fabric bias tape. Bind the other boxed corner.
Note: the plastic board is attached to bag on one side only!

Mesh Beach Bag 

6. Attaching handles (pic.  11):
Determine where the handles need to come. Punch holes correspondingly, in both the bag and the handles. Attach with rivets.
Note: As the size of the rivets never will perfectly match the thickness of the materials used, compensate the difference by using a small piece of leather or other material in the back. This will also add extra strength to the materials used.

And that's it!!

I'm wishing you a happy Summer... 
Mesh Beach Bag

Wednesday 21 September 2016

10 NYFW Street Style Looks You Can Totally Copy for Work

All eyes were on the runways at New York Fashion Week but outside the shows, the style on the streets was just as interesting. From models to bloggers, the streets of NYC were packed with fashion elites who have given us endless style inspiration. So if you’re currently struggling with what to wear to your 9-to-5 jobs, we’ve gathered a couple of street style looks that you can totally snag for your day-to-day wardrobe.
Whether your office has a slightly strict dress code or your work allows a more creative space, scroll down to see 10 outfits you can wear for the rest of the month.

1. Turtleneck Top + Cropped Jeans + Heeled Sandals

new-york-fashion-week-street-style-spring-2017-37

2. White Top + Pleated Skirt + Strappy Heels

new-york-fashion-week-street-style-spring-2017-031

      3.  Lacey top + white polo + culottes

new-york-str-rs17-4475

4. Collared crop top + Wide-leg trousers + Statement bag
new-york-fashion-week-street-style-spring-2017-78

5. Jumpsuit + Oversized polo + Belt

15

6. Slip dress + striped long sleeved top 

7

7. Statement sweater + Pencil skirt with slit

nyfw-street-style-day9-10-nocrop-w1800-h1330-2x

8. Denim jacket + Striped polo + Pleated skirt 

13

9. Plain neutral top + Bright midi skirt + Mules

16

10. Mixed prints: Floral top + checkered skirt + heeled loafers

day-8

Monday 19 September 2016

8 Pieces You Should Add to Your Work Wardrobe

http://www.starstyle.ph/2016/09/08/8-pieces-add-work-wardrobe/
If putting an outfit together every single day, first thing in the morning (especially when you haven’t even had coffee yet) is already taking its toll on you, then perhaps it’s about time for a much needed wardrobe update. To freshen up your workwear choices, all you need are a few essential pieces that are versatile so you can easily incorporate them in your existing selection of clothing.
To help you with your shopping list, here are the items we think you should add to your closet if you don’t have them yet:

1. Button-Down Dress

Button Down Dress
The wonderful thing about this must-have is that you can use it interchangeably as a dress and as a third piece. If you want to spice up your usual blouse and jeans, layering this over your outfit can score you some fashion girl points without much effort.

2. Lightweight Turtleneck

Turtleneck 2
If you already have good selection of office-appropriate shirts, then a turtleneck is just what you might be missing. Go for a lightweight short-sleeved one so you can still wear it on those days when the unpredictable weather decides to be extra-warm.

3. Midi Skirt

Midi Skirt
Yes, a pencil skirt is the safest go-to when you’re in the corporate scene. But if you want something different, a calf-length skirt does a fantastic job in giving you a sophisticated look that surely won’t earn you a memo from the HR department.

4. Long Vest

Long Vest
Perhaps it’s time to give your blazer a break. Structured and sleek, this piece can go a long way when it comes to elevating your entire outfit. You can totally wear this over anything, be it a two-piece ensemble or a dress with a shorter length.

5. Ribbed Dress

Ribbed Dress 2
Opting for a dress is – hands down – the easiest way to sort out an outfit. It’s clearly a no-brainer when all you need to worry about is deciding on your shoes. A ribbed dress is on-trend and the fabric can get you through the chilly weather which makes for a perfect choice.

6. Cropped Flares

Cropped Flares 2
If you’re all for comfort, then try a pair of cropped flares. This chic piece can join the rotation, along with your jeans and slacks. Wear it with strappy heels so your ankles won’t look too bare.

7. Wide Leg Pants

Wide Leg Pants 2
Still holding onto your slim-fit trousers? Why not try a wide-leg pair to freshen up your look? Wear it on those days when you have to look like the #girlboss that you are as it gives off a more formal, polished appeal a la Victoria Beckham.

8. Mules

Mules
When it comes to style and comfort, our shoe of choice is the mule. Once thought to be for the older set, it has made its comeback with a more youthful and sleek look. Slip into these steppers when you simply can’t be bothered to wear those stiletto pumps.

source

Sunday 18 September 2016

Friday 16 September 2016

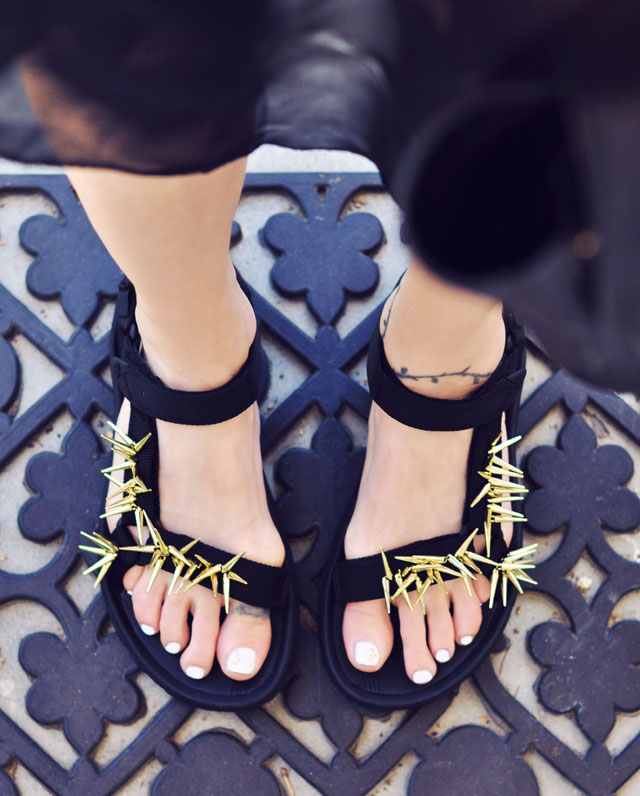
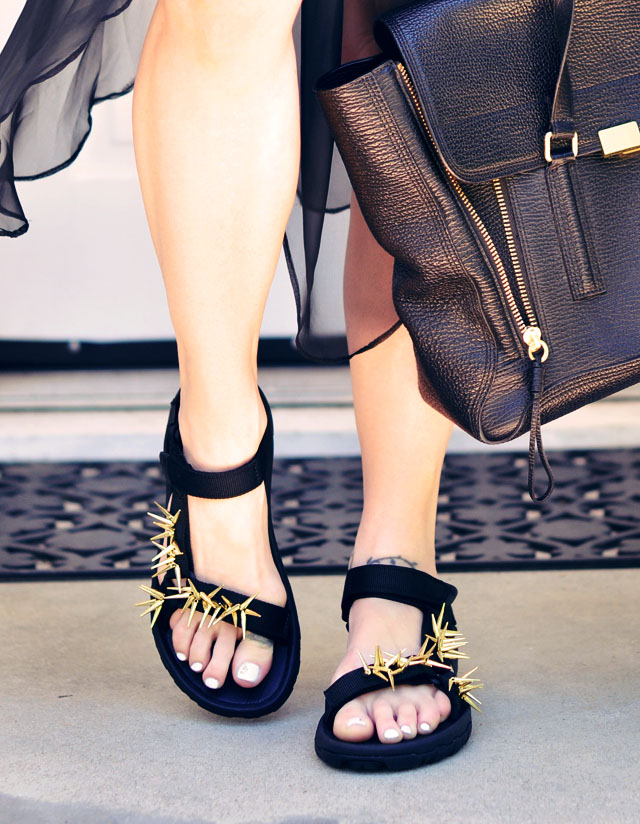
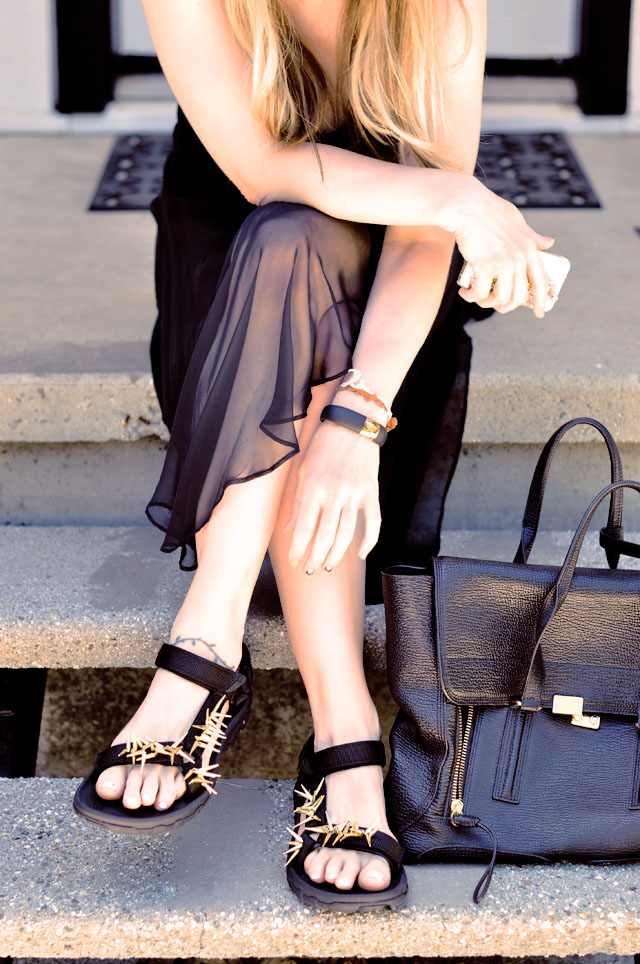
DIY EMBELLISHED SPORT SANDALS | SPIKY TEVAS

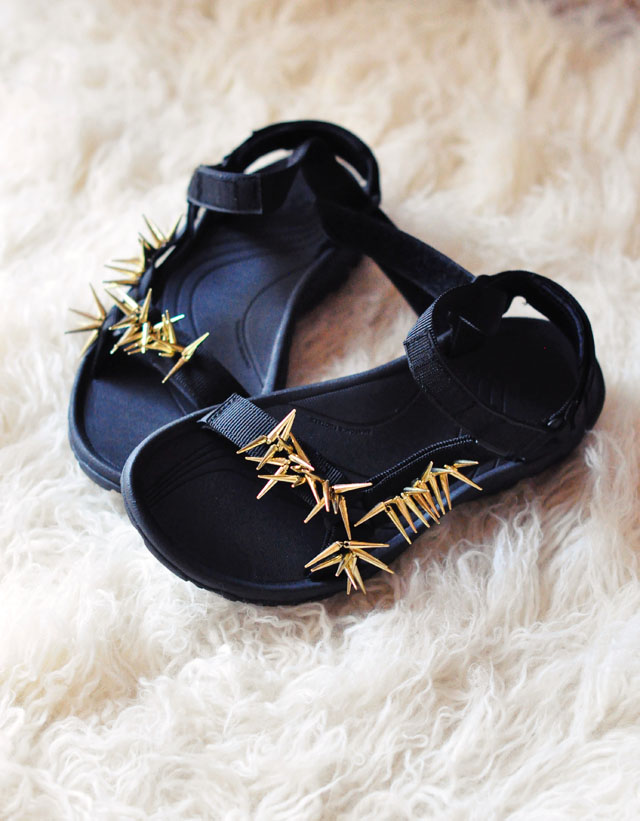
DIY Embellished Sport Sandals -Spiky Tevas
Let’s face it, fugly sandals are hot for Summer 2014. From chunky “pool” sandals andBirkenstocks, to Frankenstein flatformssport sandals and even fugly sporty slides, these “normcore” foot strap-ons are everywhere right now, and I can’t say that my feet are too upset about it. Why? Because they’re ridiculously comfortable and I just can’t say no to comfort anymore.
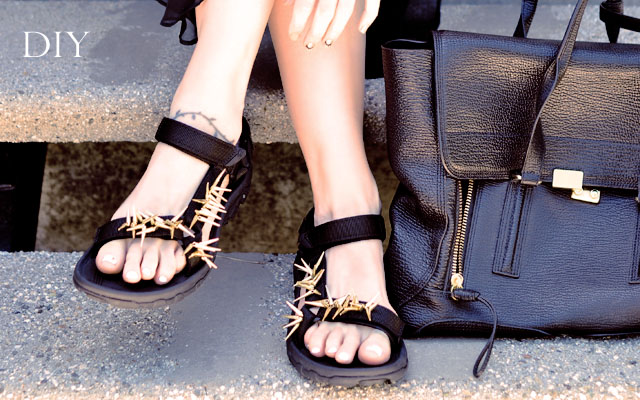
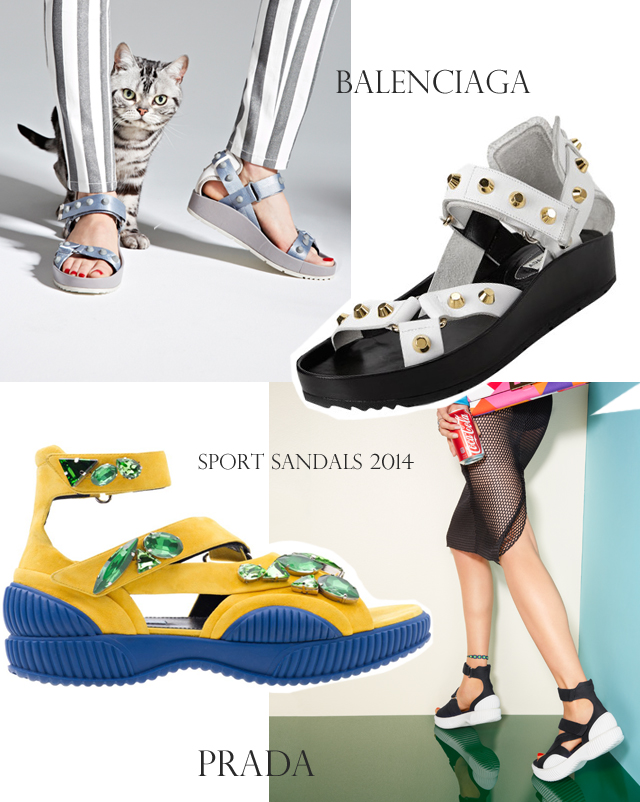
When I first saw Prada’s bejeweled sport sandals walk the Spring/Summer 2014 runway, I immediately went to Amazon and bought two pairs of sporty Teva Women’s Hurricane XLT Sandals to DIY: one in black as seen here and one in a pretty cornflower blue thinking I’d bejewel a pair similarly. But then I saw the Balenciaga Arena Ankle Strap Sandals a’la The Cat & The Flat and fell in fug-love… cut to a few months later where I was finally inspired to do something a little bit different and a little bit the same.
For reference, my inspiration below… images: Vogue, Barneys NY, Spring Shoe Guide: Sporty Sandals
Sport Sandals 2014-Prada-Balenciaga
These Tevas are really easy to run a needle and thread through, so finding an embellishment that I could stitch on vs glue was a big bonus for me for a few reasons: 1. You know I don’t love glue because I’m always worried it will not only look cheap, but also fall apart mid-wear and 2. I like the versatility of stitching because it makes it impermanent. It’s stronger through wears, but at any time, I can snip the threads and go back to the basics to add something different.
This DIY took about 5 minutes per sandal. NOTE: The spikes are plastic! Not actually spiky or dangerous, though they may look like they are! They’re totally safe!

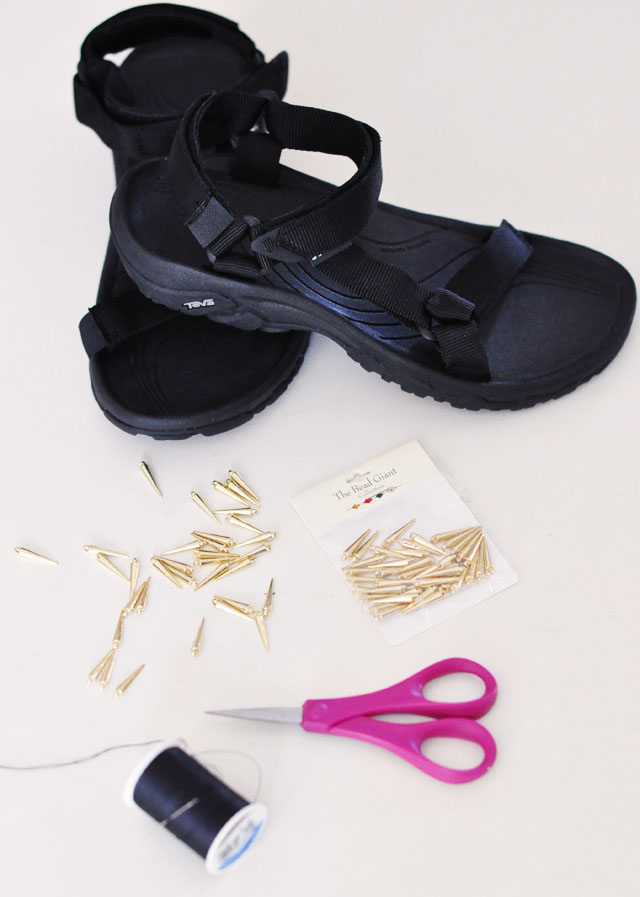
Here’s What You’ll Need…

DIY Embellished Sport Sandals -Spiky Tevas
  • Sport sandals. I chose these extra sporty Tevas for their chunkiness and similarity to the Prada version {plus, they’re more comfy and have more support for your feet than the original flat styles}
  • Embellishments of choice {preferably that you can stitch on/through} I used these gold Spike “beads” -one whole package PER SANDAL.
  • Needle/Thread/Scissors

Steps…

This is surprisingly easy! You just need a good eye for where to place your beads/spikes.
DIY Embellished Sport Sandals -Spiky Tevas
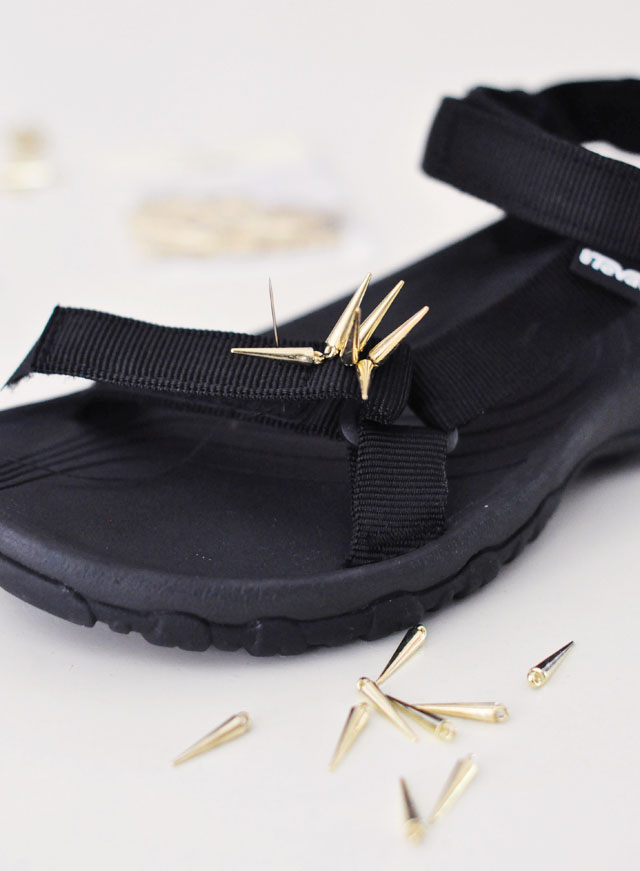
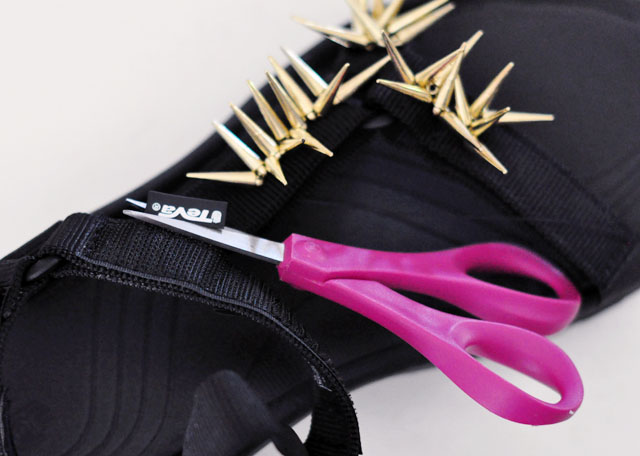
* Beginning at the corner strap intersection, but not too close to the edge/buckle in case you need to adjust to fit your foot, run a stitch up through the bottom of your nylon velcro buckle, thread two spikes through, then as if hand-stitching, just run the needle back through the nylon.
* Running your needle/thread through the velcro is a bit tougher, but not even as difficult as leather. Just make sure to use a strong needle. But it slides right through the nylon areas.
DIY Embellished Sport Sandals -Spiky Tevas
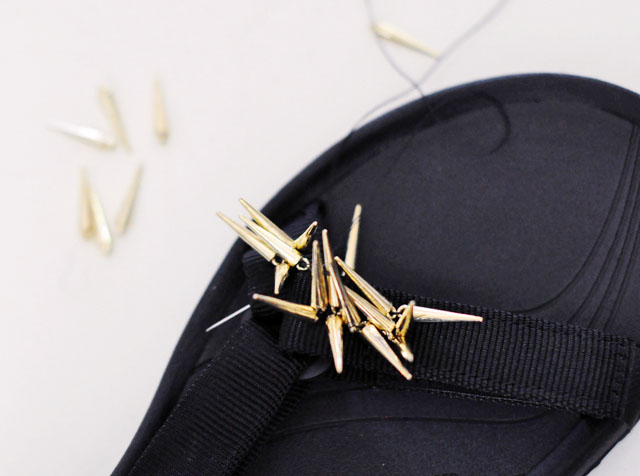
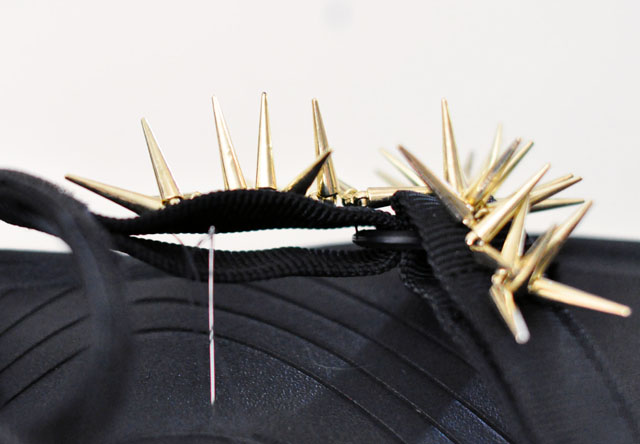
* When you add two spikes at once, then secure your thread tightly back down/through the nylon strap, the spikes stand up in all different directions, and look really fun. Add as many spikes or beads or jewels to as many straps as you like.
DIY Embellished Sport Sandals -Spiky Tevas
* Make sure you don’t thread all the way through both straps… keep your stitches to the top layer/strap so you can still adjust your sandals.
{NOTE: try on your sandals before you begin this DIY so you can adjust them perfectly to fit your feet}
* You can also embellish the ankle strap, I just chose not to.
DIY Embellished Sport Sandals -Spiky Tevas
* Snip off your Teva tag {Sorry Teva!}… simply because it distracts from the design, not because we’re trying to fool anyone into believing they’re not Tevas. There is another brand label on the sole, which is totally fine.

And… Voila!

Fugly sandals and fugly toes ðŸ™‚
DIY Embellished Sport Sandals -Spiky Tevas
DIY Spiky Sport Sandals-embellished tevas-prada-balenciaga
DIY Embellished Sport Sandals -Spiky Tevas

source